
Lead Generation Using LinkedIn and its Sales Navigator
LinkedIn has become a valuable platform for social selling insights, especially for B2B businesses. So, let us learn how you can perform business lead generation using LinkedIn’s Sales Navigator and its Lead and Account Lists!
LinkedIn has transformed how businesspeople from all over the world connect. The networking platform provides various tools to narrow down searches further. Therefore, users can quickly locate their ideal customer profile and create a list of potential customers to increase conversion.
The LinkedIn Sales Navigator
The LinkedIn Sales Navigator is equipped with filters that help users narrow their search for potential customers. In general, you can apply various filters that would aid in finding your ideal customer profile.
So, with this platform, you can create the perfect list of customers you can interact with and encourage to convert. Because LinkedIn has millions of users, you can use the LinkedIn Sales Navigator’s filters to generate the most relevant leads.
Let us explore using the LinkedIn Sales Navigator for lead generation and insights.
How to Use LinkedIn Sales Navigator for Lead Generation
ONE: Log Into LinkedIn Sales Navigator
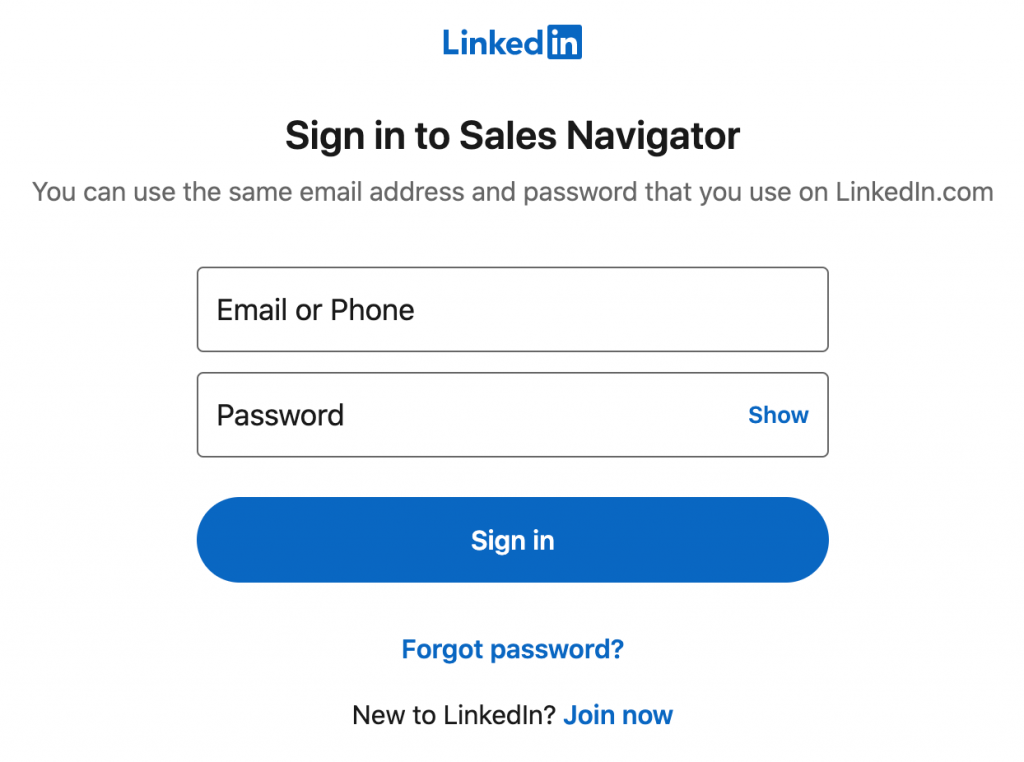
The first thing you need to do is register for a LinkedIn Sales Navigator account. However, if you already have an account, you can proceed and log in. Note: You can use the same email address and password for your existing LinkedIn profile to create a Sales Navigator account.
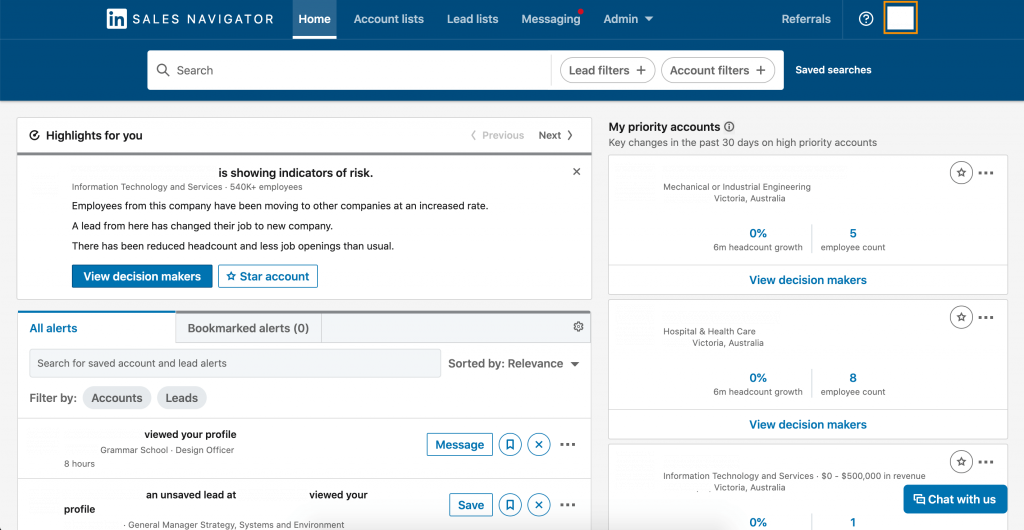
Once you have successfully logged onto your LinkedIn Page, you will see the LinkedIn Sales Navigator dashboard (as shown below).
Furthermore, the LinkedIn Sales Navigator dashboard provides users with various tools and features that help generate relevant, timely, and actionable sales insights. As such, on the Sales Navigator homepage, you will find:
- Alerts: provides notifications about your saved targeted leads and accounts.
- Priority Accounts: includes important accounts, prioritized by account changes in the last 30 days according to Headcount growth and Buyer interest.
- Trending Accounts: ensures you receive timely insights on your currently trending or popular accounts.
- Sales Navigator Coach: allows you to view core workflows and new features for an improved sales experience.
TWO: Customize Sales Preferences
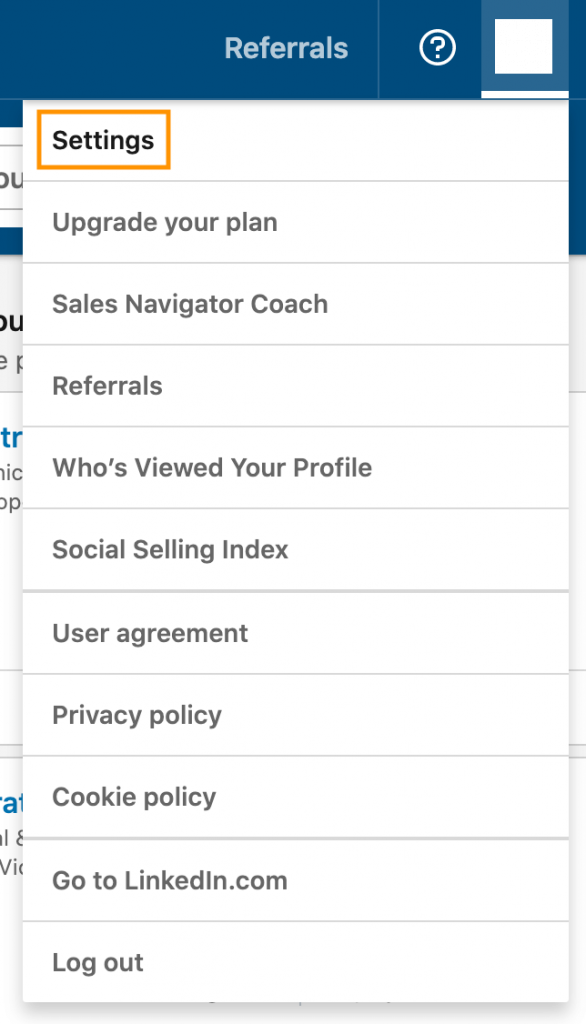
To start getting insights with the LinkedIn lead generation process, you first need to customize your sales preferences. Click your LinkedIn profile picture in the upper right corner of the page, and from the drop-down results, click the “Settings” tab.
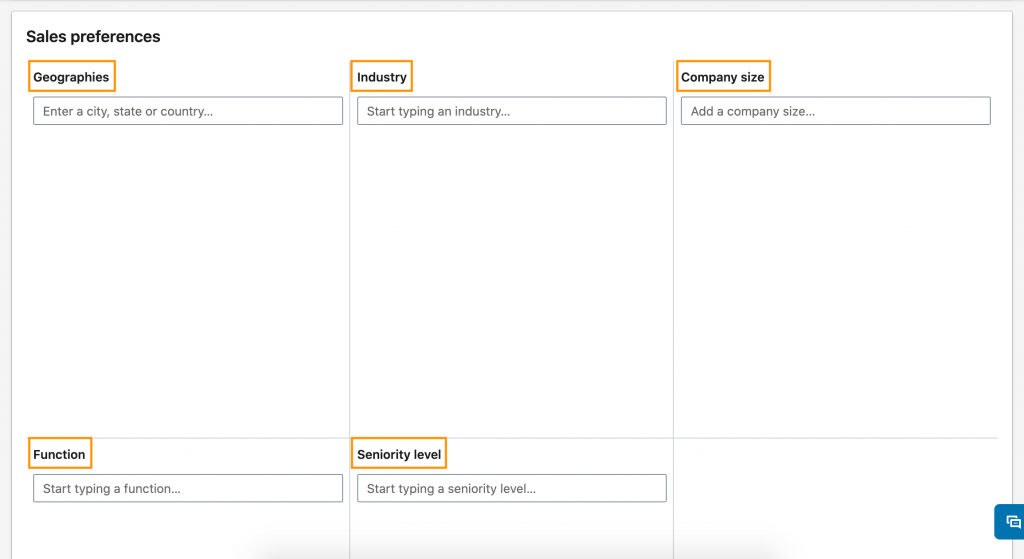
On the Settings page, scroll down to find the “Sales Preferences” section. Customizing your sales preferences lets Sales Navigator know your ideal leads according to Region/Geography, Industry, Company Size, Function, and Seniority Level. In addition, you can choose multiple preferences to generate lead data recommendations according to your interests.
THREE: Utilize Advanced Search
Of course, LinkedIn can give you sales insights. But also aside from customizing your sales preferences, you can also use the “Advanced Search” feature to narrow your search further. You can find the advanced search bar on top of your screen, below the menu bar. You can apply various lead filters (and account filters) to generate more relevant leads on the advanced search bar.
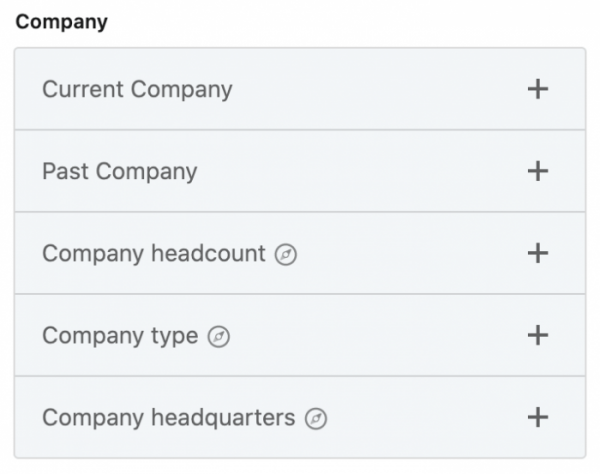
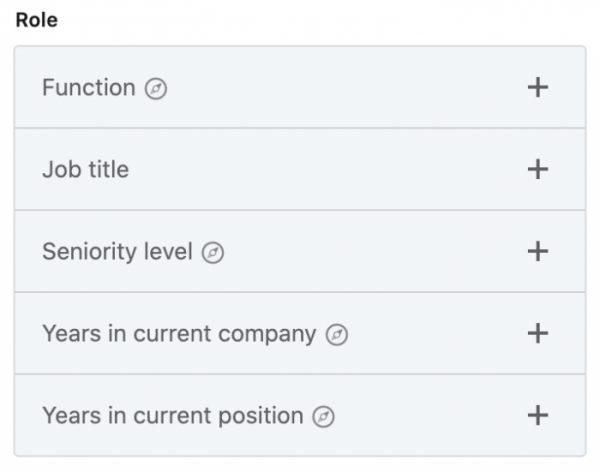
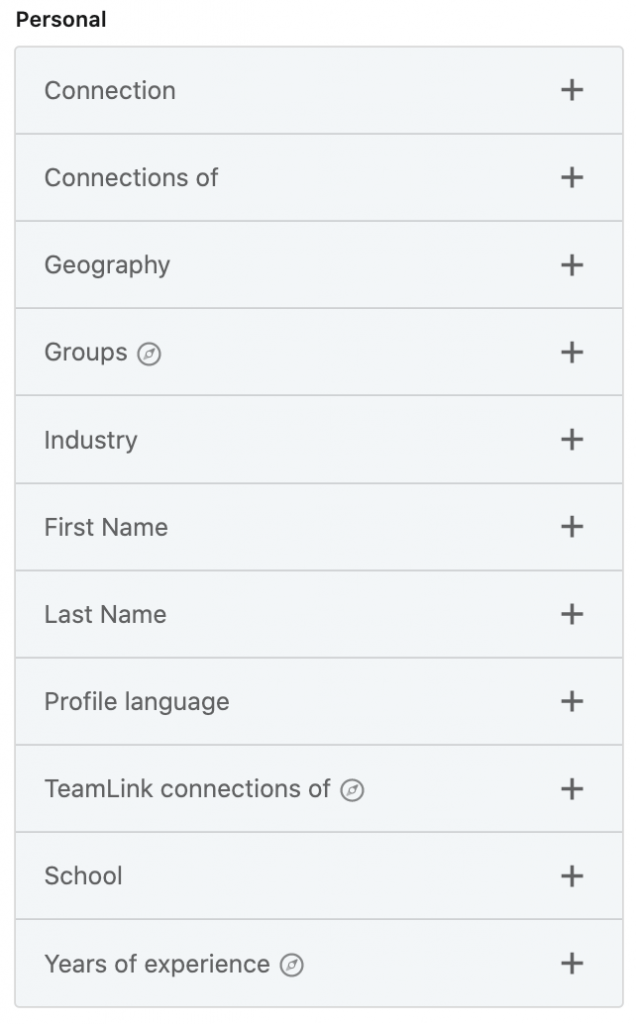
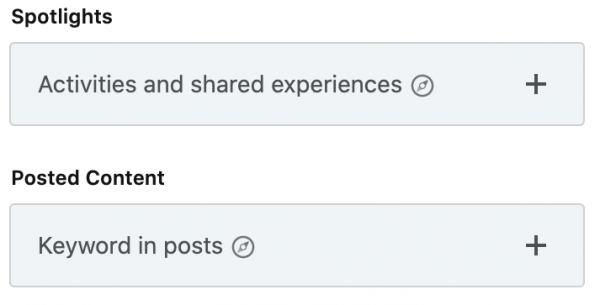
So, here are the filters that you can use to narrow down your search for leads:
Company
- Current Company
- Past Company
- Headcount (self-employed, 1-10, 11-50, 51-200, 201-500, 501-1000, 1001-5000, 5001-10000, or 10001+)
- Type (public company, privately held, non-profit, educational institution, partnership, self-employed, self-owned, or a government agency)
- Headquarters (include or exclude particular locations)
Role
- Function (include or exclude particular roles)
- Job Title (current, past, current or past, or past not current)
- Seniority Level (include or exclude particular seniority levels)
- Years in Current Company (less than 1 year, 1 to 2 years, 3 to 5 years, 6 to 10 years, or more than 10 years)
- Years in Current Position (less than 1 year, 1 to 2 years, 3 to 5 years, 6 to 10 years, and more than 10 years)
Personal
- Connection (1st Degree Connections, 2nd Degree Connections, Group members, or 3rd Degree+ Connections)
- Connections of Geography (include or exclude particular locations; by region or postal code)
- Groups
- Industry (include or exclude particular industries)
- First Name
- Last Name
- Profile Language (Arabic, English, Spanish, Portuguese, Chinese, French, Italian, Russian, German, Dutch, Turkish, Tagalog, Polish, Korean, Japanese, Malay, Norwegian, Danish, Romanian, Swedish, Bahasa Indonesia, and Czech)
- TeamLink connections of (a LinkedIn member)
- School
- Years of Experience (less than 1 year, 1 to 2 years, 3 to 5 years, 6 to 10 years, or more than 10 years)
Spotlights and Posted Content
- Activities and Shared Experiences (changed jobs in last 90 days, mentioned in the news in last 30 days, posted on LinkedIn in 30 days, following your company, have shared experiences with you, or with TeamLink intro)
- Keyword in Posts
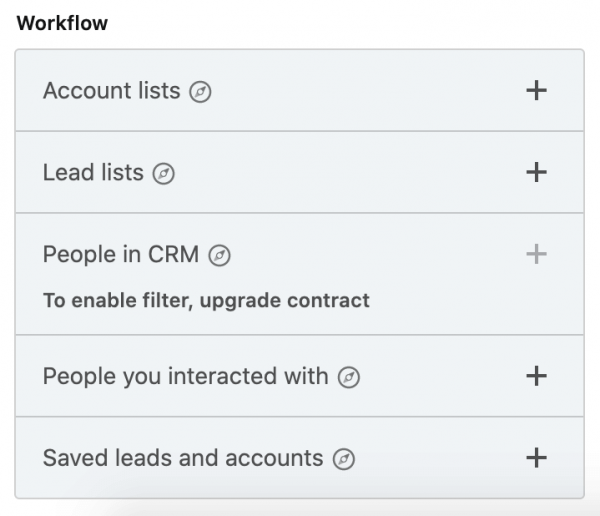
Workflow
- Account Lists (include or exclude particular account lists)
- Lead Lists (include or exclude particular lead lists)
- People You Interacted With (remove profile viewed people or remove contacted people)
- Saved Leads and Accounts (include or exclude particular saved leads or accounts)
FOUR: Organize Prospects with Account and Lead Lists
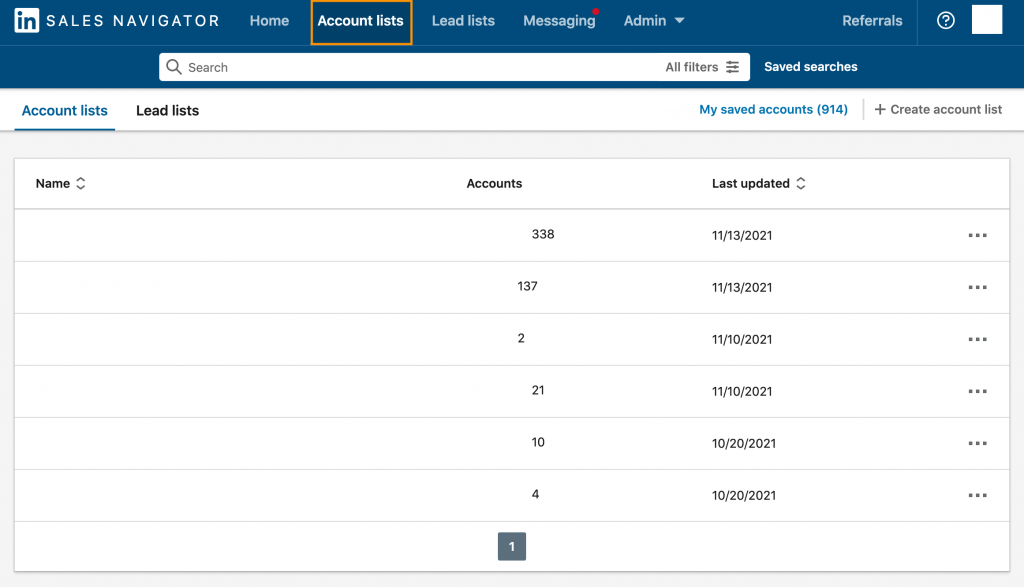
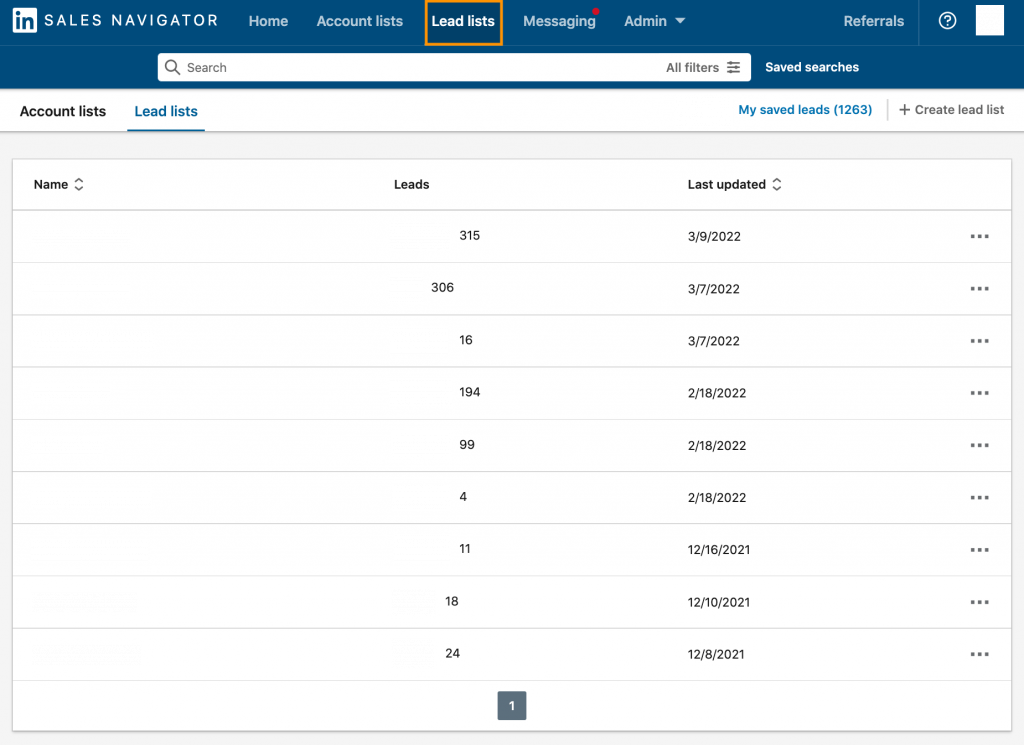
On top of the LinkedIn Sales Navigator dashboard, you can find the “Account Lists” and “Lead Lists” menus. These lists help keep track of your leads and accounts. They are also great to organize your workflow. Moreover, it is easier to determine whom to interact with if you use B2B lead lists.
As such, lists are excellent in helping you prioritize and manage your leads, accounts, and contacts. Click on the “Account Lists” button to see all accounts saved to your custom account lists.
To see all of the leads saved to your custom lead lists, click on the “Lead Lists” button.
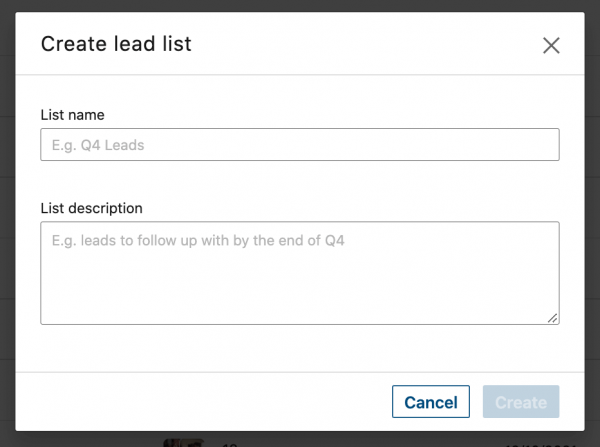
You can create a lead list by clicking the “Create lead list” button in the upper right corner of the page. Then, you have to enter the list name and a short description.
FIVE: Increase Conversion with Messaging
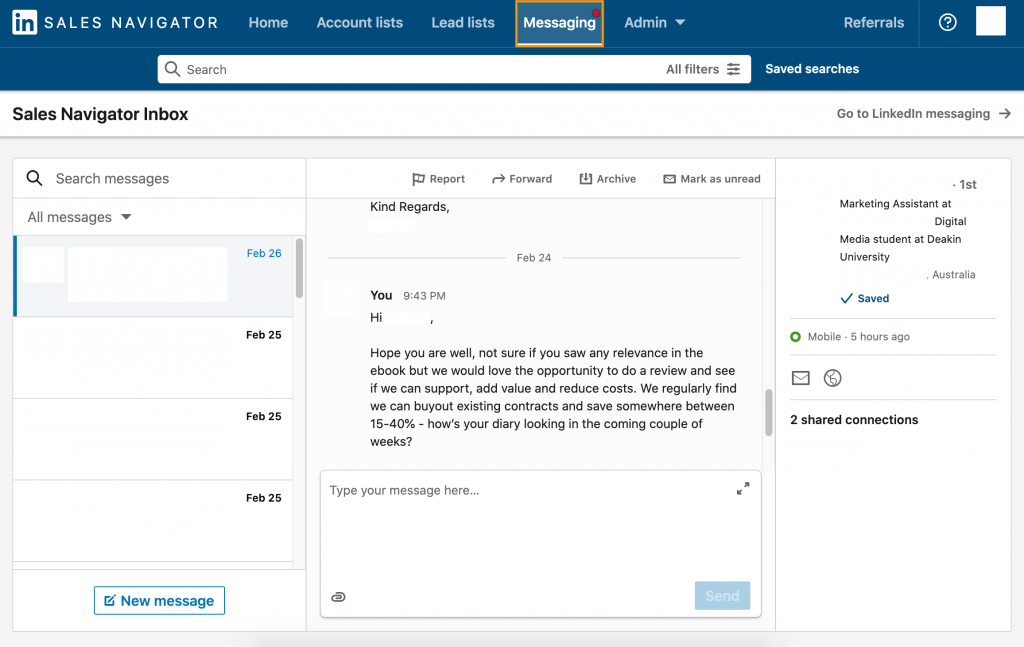
Aside from “Account Lists” and “Lead Lists,” you can also find “Messaging” on the menu bar. The Messaging feature helps you communicate directly with your prospects.
Thus, if you properly utilize Sales Navigator’s messaging feature, you can increase conversions and improve ROI for your business.
Before we part ways, do you have any tips on maximizing the LinkedIn Sales Navigator? Also, if you need help navigating this beneficial networking tool, feel free to reach out to a digital marketing company that offers SEO services in the Philippines!









Comment 0